Rooting The Samsung Galaxy Tab 7Rooting The Samsung Galaxy Tab 7
Updating the T-Mobile Galaxy Tab 7 isn't as complicated as you might think. BYTE's David Chernicoff shows us how.

Have you and your Samsung Galaxy Tab 7 been orphaned by T-Mobile? You can get your tablet back in the game with some custom hacking.
Toward the end of 2010 I decided that a Samsung Galaxy Tab 7 would make an excellent holiday gift for my wife. Her job as the marketing director for an Internet-based industrial equipment company meant that she spent a fair amount of time each month traveling to customer sites and trade shows, and tools to make her life easier were always welcome. In brief, the tablet would let her get her email, Web surf, and get some work done without having to carry around a full-size notebook. In addition, the 7-inch screen made it much more purse friendly than a 10-inch tablet.
At the time I bought the tablet, the best deal available was from T-Mobile, a decision that we eventually came to regret, for two reasons. First, T-Mobile coverage was nowhere nearly as good as advertised, and even when we checked in advance that a location she would be in would have service, more often than not there was little to no 3G connectivity available outside of major metropolitan areas. Second, T-Mobile never bothered to provide any updates to the Android 2.2 (Froyo) operating system on the Tab, despite the fact that Samsung made the much-improved Android 2.3 (Gingerbread) implementation available for the device.
After more than a year of use, the Tab began to experience the Android equivalent of Windows rot: Too many apps installed, lots of downloads, pictures, videos, etc., clogging up the works and needing to be managed. I decided the simplest fix would be a factory reset and wipe back to the device's original state. But realistically, I would need a good backup with a selective restore to make this practical. And to install and use a good backup application--Titanium Backup Pro is my favorite--it was very likely I would need to first root the Tab.
Rooting, if you're not familiar with the term, is the process of elevating privileges on your Android device in order to gain root access. This lets you perform operations that the device is by default set up to forbid.
Fortunately, the Tab 7 has been on the market so long that rooting it has become old hat. The now-ubiquitous SuperOneClick Android rooting tool makes it easy. Here's a step by step:
Download SuperOneClick.
Make sure that you have the drivers for the Tab installed on your computer. If you don't, they can be downloaded from the Samsung support site.
Disconnect your Tab from your PC, and go to Settings-->Applications-->Development and enable USB debugging.
Connect the Tab to your PC.
Launch SuperOneClick.
When SuperOneClick sees your Tab, just click the Root button.
Let SuperOneClick do its thing. It will root the tablet and then install Superuser and Busybox, which are the support tools needed by the device to perpetuate its untethered root.
When SuperOneClick completes, reboot your Tab.
That's all there is to it. You are now the owner of a rooted Samsung Galaxy Tab 7 and can make use of applications that require root access such as Titanium Backup Pro.

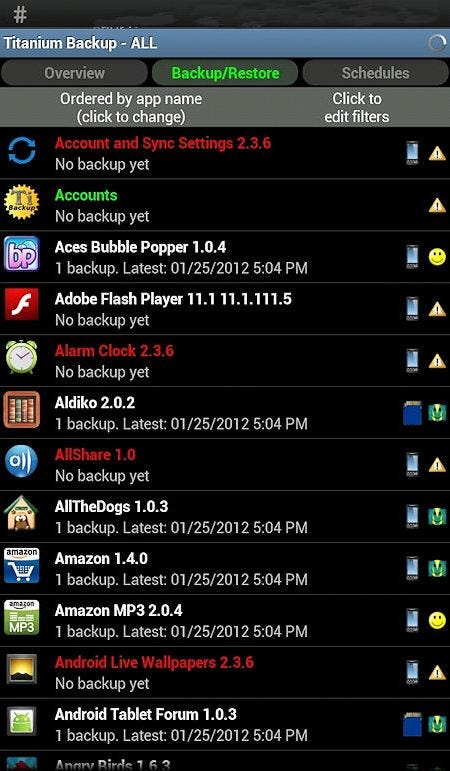
Titantium Backup Pro's backup and restore status screen.
With the Tab rooted, I went to the Android Market and installed Titanium Backup Pro. I then launched the app and had it do a batch backup of all the apps and data on the Tab. After the backup completed, I then did the first tricky part. Using my favorite file manager (ES File Manager, free in the Market), I copied the folder that Titanium Backup Pro created to the external SD card in the Tab. This last step is important, because a factory reset would wipe all of the data from the internal storage.
Now I was ready to do a complete wipe of the Tab back to factory defaults. It's easy to do: You simply open Settings-->Privacy and choose Factory Data Reset. This does what is called a hard reset on the device. But in my research I had found that the Android community had already done the work necessary to bring Android 2.3.6 to the T-Mobile version of the Galaxy Tab, both in the form of the stock Samsung ROM, and custom ROMs based on the 2.3.6 Samsung release. In fact, the development for Android 2.3.6 was stable and pretty solid, with current additions to the various custom ROMs and kernels being primarily maintenance tweaks, as the bulk of the current development effort is looking at putting Android 4 (Ice Cream Sandwich) on the original Galaxy Tab 7.
Much of discussion on the Galaxy Tab forum on the XDA Developers Forum led me to settle on the custom kernel and ROM developed by Team Overcome. They developed a custom kernel and a custom implementation of the Samsung Gingerbread codebase that seemed stable and feature rich. Their website contains a complete guide to installing their kernel and custom ROM on the Galaxy Tab and, from my perspective, the fact that they make special note of the T-Mobile version gave me an added feeling of security. Development history and user discussions of potential issues with this ROM can be found here.
Team Overcome's directions include a how-to on first upgrading your Froyo Tab to the current Gingerbread implementation. If you like, you could actually stop at that point and treat the T-Mobile Tab as if it had gotten an official Samsung update. For those like me who prefer to go a bit further, the instructions are there to go from the stock Android 2.3.6 ROM to Team Overcome's custom implementation. All of the files and downloads necessary to complete the update to Android 2.3.6 or Team Overcome's custom ROM are linked in the directions. The entire process should take less than an hour, including backup, for a technically comfortable user.

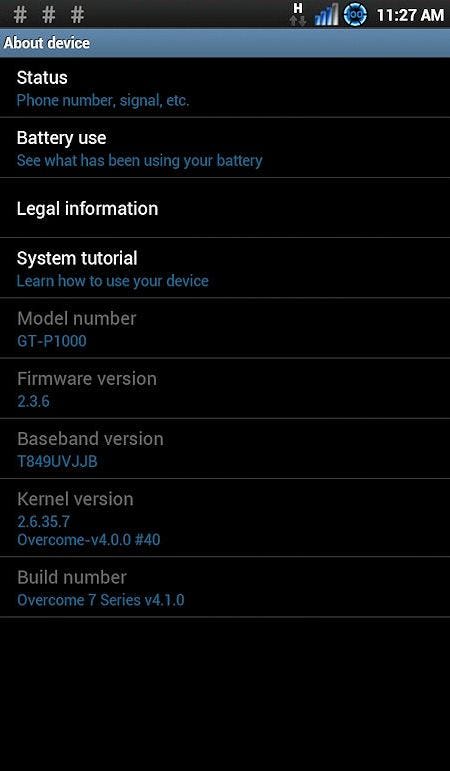
Samsung Galaxy Tab 7's About page, post kernel and ROM upgrade.
As you can see in the image above, my Tab is now running both Team Overcome's custom kernel and ROM with version 2.3.6 on Android. It's up-to-date with the latest release of Gingerbread, now behaves like our other Gingerbread-based Android phones and tablets, and is running faster than it did with the original Samsung configuration. It was about an hour's worth of work to install Titanium Backup Pro from the Android Market, then reinstall all of the backed-up apps I wanted on the tablet. I did not reinstall applications that my wife had decided she was no longer using, which meant that only 50 or so of the 100 apps previously on the tablet needed to be restored.
Since the update, she has been using the newly resurrected Tab with no problems whatsoever.

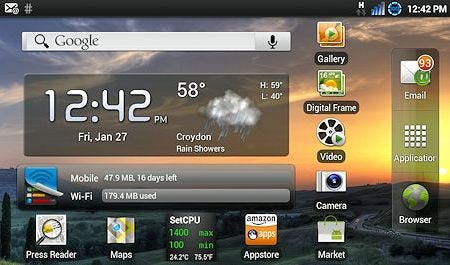
The upgraded Galaxy Tab 7's main Home Screen
About the Author
You May Also Like


